
. . . Imperial Navy probed Rebel lines. . .
Alliance Free News interrupts your standard Imperial propaganda to bring you this story.
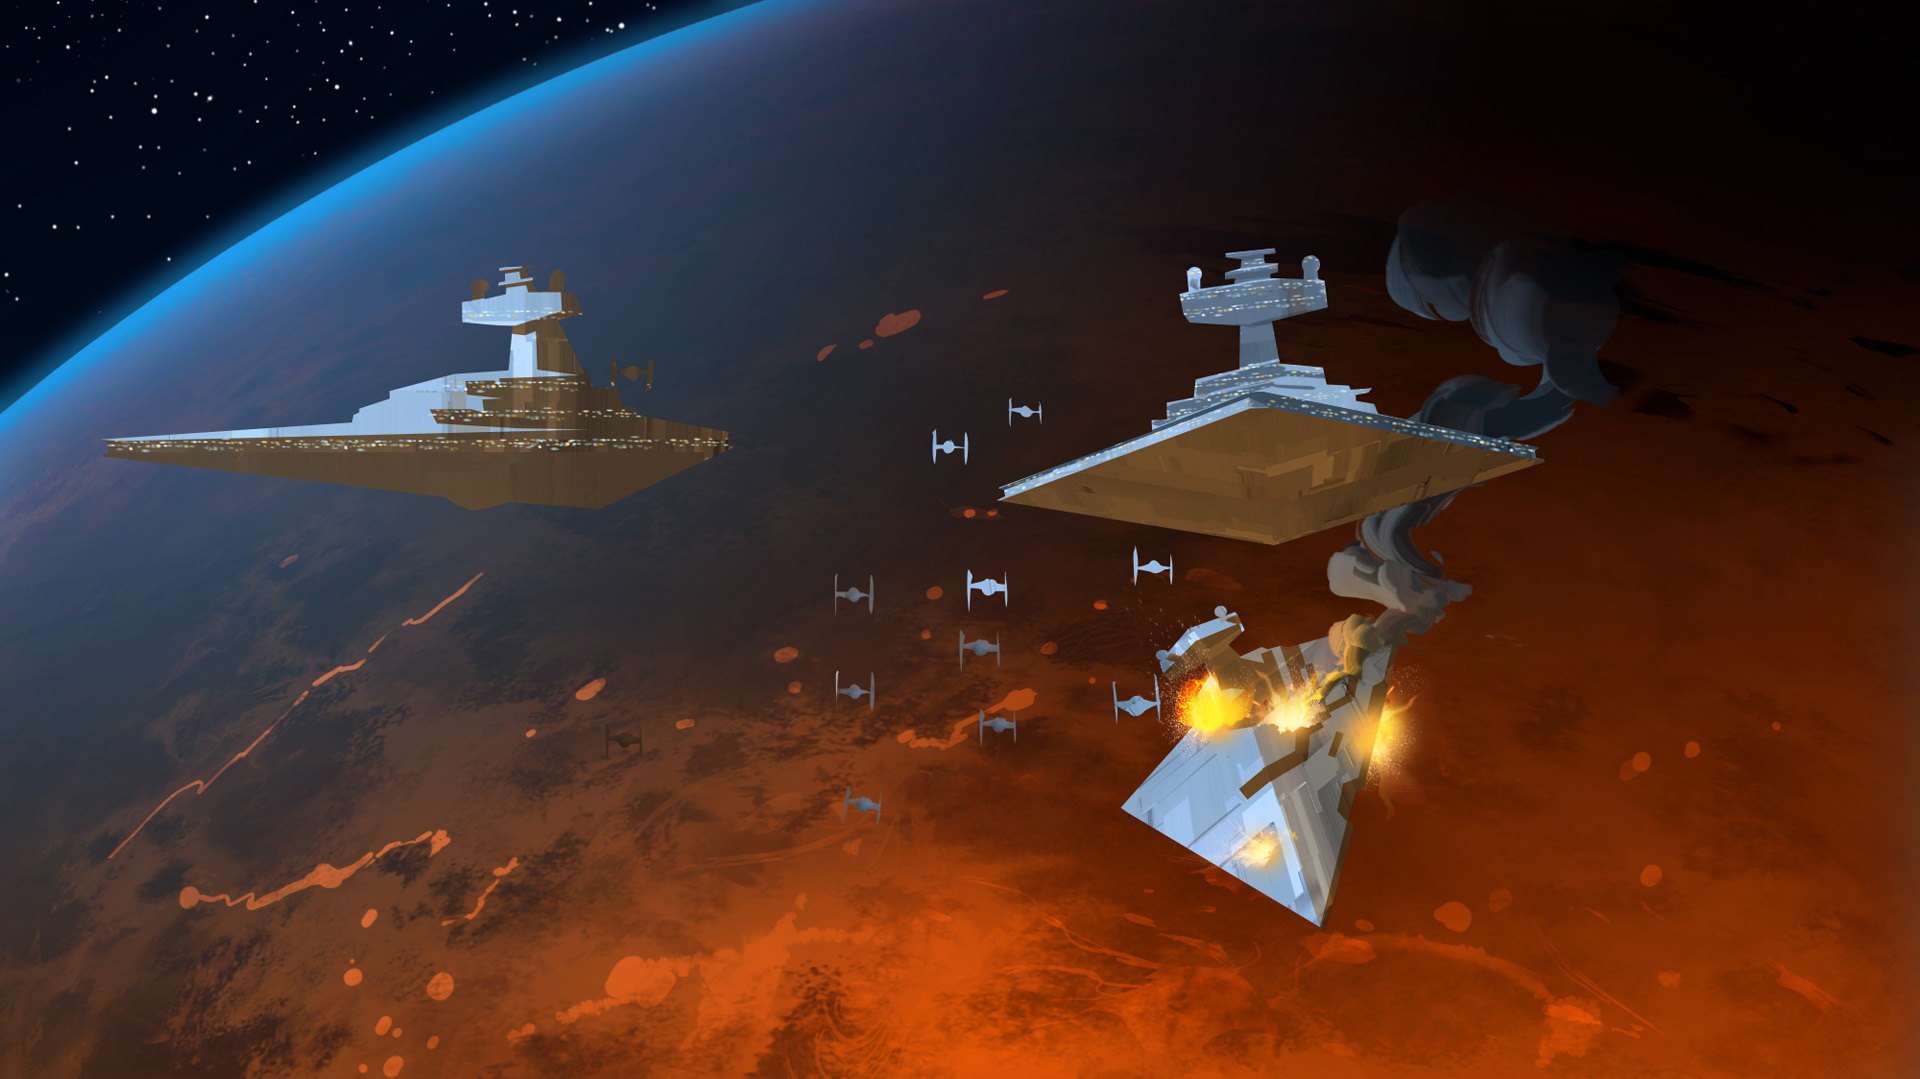 |
| Destruction of an Imperial Star Destroyer at the hands of the combined firepower of the Blue Fleet |
Through the expert teachings of Admiral Akbar, Commander Lyraeus was able to dispatch not one but two Imperial Class Star Destroyers commanded by Commodore Ozzel. The battle had little casualties for our brave combatants in the Blue Fleet.
While Commodore Ozzel's use of the aggressive Tarkin philosophy failed him in this battle, we have heard that he is being promoted to the position of Admiral of Darth Vader's "Death Squadron". We hope that his ineptitude continues to favor our cause in the future and wish the good Commodore luck and long life in his new position.
With the combat growing fiercer in the sector,we hope to bring you more news from the front lines.
This is Alliance Free News the voice of the Rebellion signing off.
. . . commission at the head of Lord Vader's personal squadron of star destroyers. . .
HNN Article: Empire Gathers Valuable Intelligence on Mon Calamari Forces
System: Dellalt
WINNER: Lyraeus (Rebels)
POINTS: 400
OBJECTIVE: Advanced Gunnery
398pts IMPERIALS: Mikael (First Player)
Imperial II-class Star Destroyer (Objective ship)
Admiral Ozzel
Phylon Q7 Tractor Beams
Admiral Ozzel
Phylon Q7 Tractor Beams
Imperial I-class Star Destroyer
Engineering Captain
Phylon Q7 Tractor Beams
Devastator
Engineering Captain
Phylon Q7 Tractor Beams
Devastator
Imperial Raider: Raider II-class Corvette (48)
Squadrons:
"Howlrunner"
Tie Fighter Squadron
Tie Fighter Squadron
Tie Fighter Squadron
Tie Fighter Squadron
Tie Fighter Squadron
Tie Fighter Squadron
Tie Fighter Squadron
398pts REBELS: Commander Lyraeus (Second Player)
MC80 Assault Cruiser (Blue Citadel - Objective Ship)
Advanced Projectors
Electronic Countermeasures
XI7 Turbolasers
•Admiral Ackbar
•Home One
Assault Frigate Mark IIB (Blue Majesty)
Advanced Projectors
Gunnery Team
XI7 Turbolasers
Assault Frigate Mark IIB (Scars of Freedom)
Advanced Projectors
Gunnery Team
XI7 Turbolasers
Squadrons:
Tycho Celchu (Riuka Nadori) - Lightning Squadron
A-Wing - Tornado Squadron
A-Wing - Tornado Squadron
A-Wing - Barracuda Squadron
This game was a fun for me in all honesty. I was intimidated because Mikael was bringing two Imperial Star Destroyers to the fight and the last time I had faced one of those I was destroyed horrendously.
So we flipped for who would get to pick for initiative since we were tied (Mikael usually likes maxing points so this usually does not happen). Mikael won the flip and decided to go First and he choose my Advanced Gunnery. . . Immediately I was suspect of him but at the same time really elated. Of course I chose my Assault Cruiser to be the objective ship because shooting 6 red dice out of my side arc twice is always a great thing. I will say, Advanced Gunnery is ALWAYS a good choice for the MC80 even if you are first player because that HUGE side arc can usually see two hull zones on the same ship.
So Turn 1 is going on and I have engineering commands for all my ships, I have decided to deploy them all horizontal to the table edge and going speed 2. Since Mikael had the Tractor Beams I really could not care less about them though. The plan was to stick as speed 2 and let the ISD's come to me.
This planned worked well actually. Mikael started his ISD's at speed 1 and the Raider at 4. At turn 2 he got aggressive and usedused Ozzel to jump to speed 3 with the ISD's which brought the Devastator into all the firepower of my fleet.!. . and it was then destroyed. . . Ozzel is living up to his reputation. The Raider got nicked by the side of of the Assault Cruiser and wilted under its amazing close range firepower. . .
My squadrons really did nothing this game and just hid in asteroids to negate the Swarm bonuses. Worked like a charm though I think I did lose one of them towards the end of the game.
The last ISD survived till the end which had me worried because my lead Assault Frigate (Scars of Freedom) got to the point where damage was starting to be dealt to it and was even dammed by the remaining ISD. . . Sadly XI7 Turbolasers proved their weight in points several times over this game against both ISD's and it went down at last at turn 5.
No comments:
Post a Comment